Saturday, April 30, 2011

Tool Review: We R Memory Keepers Seweasy

I love a new tool and I'm especially a big fan of those from We R Memory Keepers! One of the newest and hottest ones is the Seweasy, a paper piercer that you roll across you page to create holes in which you can then stitch embroidery floss through. I'm a huge fan of stitching on pages but don't have the patience to use a needle or haul out my sewing machine just for a few lines. This tool has solved that problem!


We used this tool recently in the Seasonal Scrapbook Solutions class at Craft City where we created raindrops on our pages. (See the April Showers page for details.)

The tool comes with removable heads that allow you to change to different stitch patterns. On of my favorite things, is the handy needle storage in the base of the tool handle. The tool come with a basic stitch head as well as the large paper stitching needle.

What does not come with it and I would recommend is the big foam mat. If you don't have this, your best bet is to put a piece of felt or foam sheet underneath, otherwise the piercer doesn't have the chance to sink through the paper.

On my page, I used two plys of embroidery floss and stitched through to create rain. I did notice if you press too hard it leaves dents on the sides of the stitches and if you don't press hard enough it won't pierce. I recommend practicing on scraps of paper before actually doing this on a project.

There are so many option and the website has great ideas as well as a few YouTube tutorials.


This tool is hard to find in stores and is on backorder on many websites so if you find it, get it!

April Showers Layout


This layout was part of the Seasonal Solutions Scrapbooking Layout Class for April that I taught at Craft City. There are a few kits available for purchase at the store for a limited time.
The first page shows how photos fit on the mattes. The instructions that follow included a black matte behind the April Showers title, but in the end I preferred the layout without it.

1. In our class we used the Sizzix and a dot embossing folder to texturize the green paper. This is optional and if you have embossing folders or embossing plates you can add this feature.


2. Using a round template (such as a plate or bowl edge) trace the slope of the hill on the two pieces of green paper. You should create hills that slope in opposite direction. The key is to start the slope high on one end, and end low on the other.


3. Take a sheet of blue cardstock. If it has an edge for the branding & pricing, use a paper trimmer to trim the sheet to 12X12.

4. Adhere the hill with the high slope on the left, to the left edge of the paper.

5. Using a paper trimmer, cut two 4-1/2 X 6-1/2 inch mattes for photos. This will create a matte with 1/4 inch on each side of your photos. Adhere to the page as shown.

6. Take the three pieces of the boot and glue the yellow on top of the black, and the black notch, lining everything up at the top of the boot. In class we used scrapbooking chalk to create shadows and add dimension to our paper piecings.

7. Using tacky glue or glue dots, adhere one boot on the top of the hill, and the second boot on top, kicking out slightly.

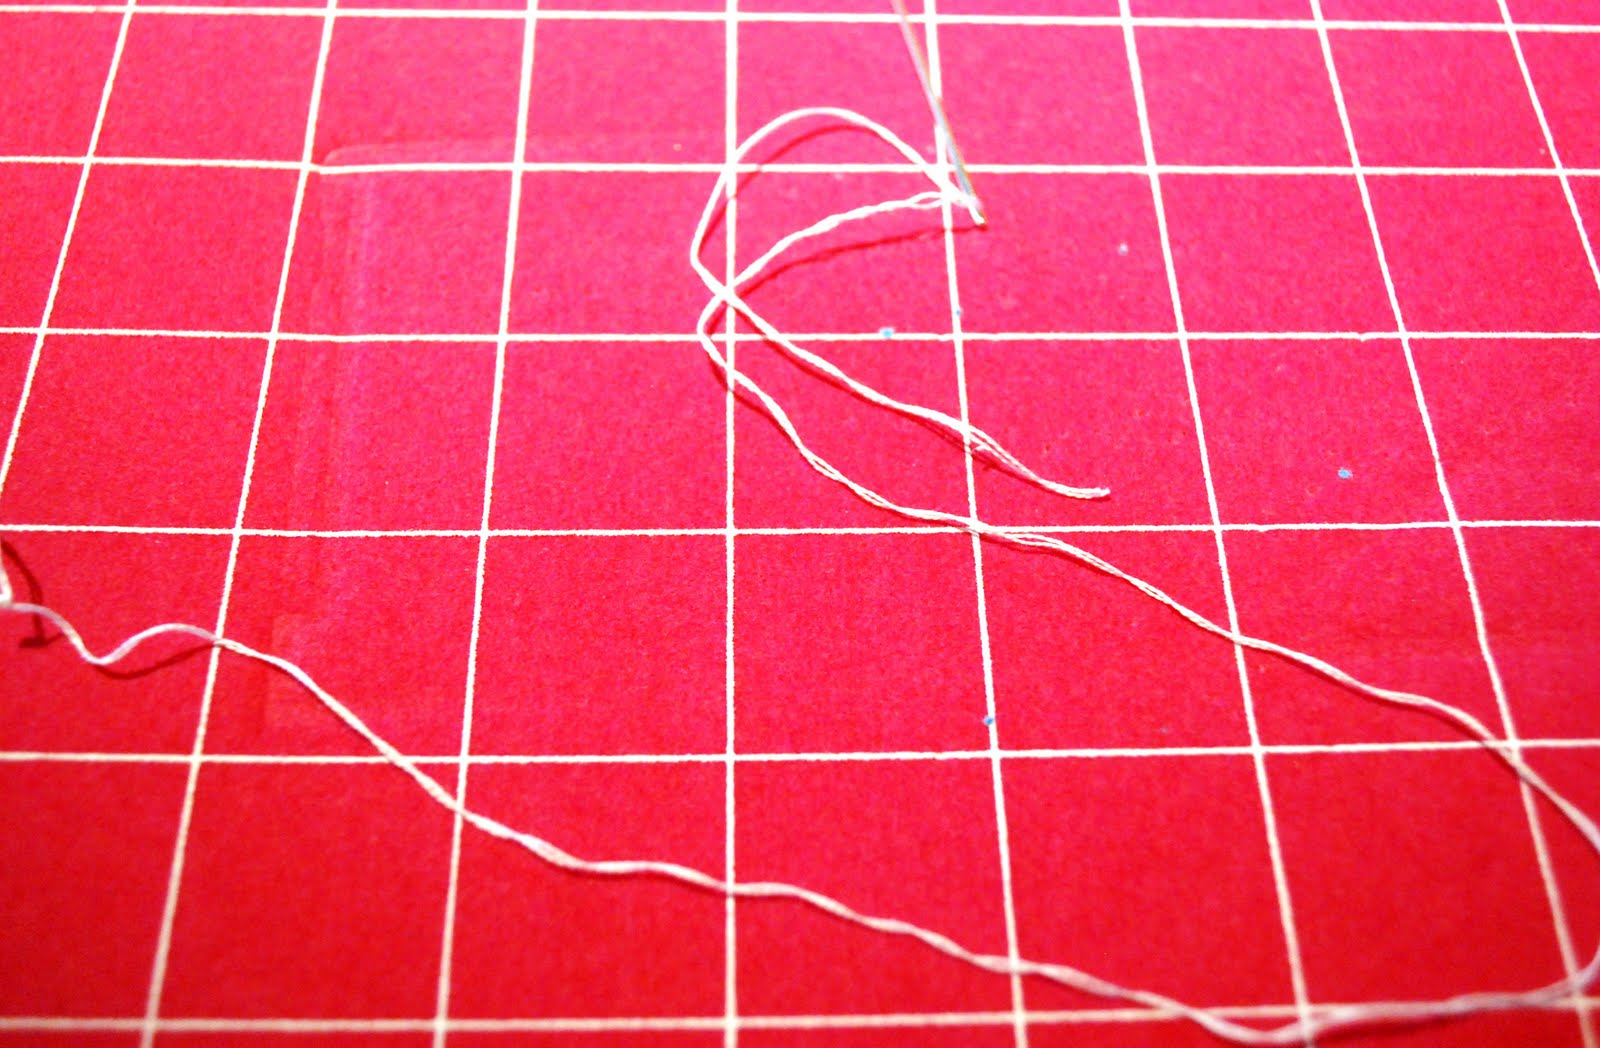
8. We chalked the edges of the large cloud and then adhere to the top of the page. In class we used the SewEasy to pierce the paper and stitch raindrops with white embroidery thread. You could also do this with a needle to pierce the paper, or as shown here, use a white gel pen to draw the stitiched raindrops.

9. Glue together the paper pieced sun and in class we chalked the edges in orange. Adhere to the page on top of the large cloud.

10. Trim out the teardrop shaped rhinestone and add to the end of the "stitched" rain.

11. Chalk and adhere the smaller cloud slightly overlapping the sun. You could also use a pop dot if you want extra dimension to your cloud.

12.  Now take your second blue cardstock to create the second page of the layout. Adhere the opposing slope to the right hand edge of the paper.

13. Cut and glue the same style and size black mattes from the first page. You could either do two mattes, or one and the title will go directly on the blue cardstock. Adhere to the page so they mirror the location of the first page of the layout.

14. Take the black umbrella cut out and adhere the yellow umbrella piece on top lining up the edges. Add the pink and blue to the top layer. Chalk the edges if desired. Adhere to the right side of the page.

15. Take the flower punches and using a pen end, press into the center to give some dimension to the flowers. Adhere to the page using glue dots or tacky glue.

16. Add rhinestones to the center of each flower. Cut out the remaining raindrop rhinestone and add dropping off the right edge of the umbrella. Add the green rhinestone "leaves" to the edges of two of the flowers.

17. Chalk and adhere the large cloud and then the smaller cloud overlapping it.

18. Adhere the title to the page or on top of the black matte.

19. Using a white gel pen, add stitching to the letters.


Saturday, April 23, 2011

Easter Treat Box

This little treat box if perfect to fill with candy and treats for family and friends on Easter and all you need are some basic scrapbooking tools! Download the PDF and you'll be set to create!
 Here's how to do it. Download the PDF and print it to orange cardstock. Click on this link to download: http://www.splitcoaststampers.com/forums/templates-f143/carrot-box-short-stout-t328272.html#post8946295


Once you've printed it to the cardstock, using good detailing scissors, cut out the pattern on the solid lines.
Next you will score the box on the dotted lines. I used an embossing tip and lined up the dotted lines with the gutter of my paper trimmer. This will give you a straight even embossed score line.
Scoring the lines will give your box crisp even edges, and make it easier to fold into it's shape.

Add adhesive with tacky glue or a glue runner to the long flap along the triangle edge.
Adhere the flap to the inside of the triangle edge to create the triangle box.
You should now have your carrot shape and the top edges will be able to fold in.

Holding the top tabs together, punch a hole in the center top.

At this point, you can fill your carrot with treats.
Take a green pip cleaner and trim in half.
Insert them through the hold until you reach their center and bend them up.

Crinkle them to create the carrot top.

Using a brown pen, draw lines to create a carrot look.

Finish off with a bow and add a tag if desired.

Sunday, April 10, 2011

April Showers

There is nothing like Springy greens and sunny yellow to bring some brightness into the gray cloudy April weather!
This month I created this April Showers layout kit which will be available for purchase at Craft City.
Be inspired by the flowery stickers or to create this layout, follow these instructions:

Ink the edges of the included die cuts.
 1. Ink the edges of each of the included die cuts including swirls, flowers, and clouds. To get into the small edges, I used a foam bruch with my brown ink pad.
All edges of the papers have been inked.
2. If you have a border punch of deco edge scissors, scallop one of the long edges of the greens and yellow cardstock. Ink all the edges of these blocks as well as the edges of the cream cardstock.

3. Adhere the blocks of greens and yellow cardstock to the cream 12X12 cardstock.
4. Adhere cardstock stickers across the page over the cardstock. Leave a small gap between the two strips.
5. I matted my photo on cream cardstock but this is optional. You may also fit two pictures if placed horizontally on the page. Adhere over the sticker strips.

6. Trim four inches of orange ribbon.
7. Tie the four inch strip onto the longer strip left.
8. Slide the ribbon to the spot on the ribbon desired and then adhere the ribbon over the photo using glue dots or glue runner.

9. Trim cardstock swirl in half.

10. Adhere next to the photo alongside the ribbon.

11. Assemble the paper flower using tacky glue and the center of each layer and topping off with the green rhinestone.

12. Adhere the selected cardstock stickers as shown.

13. Adhere the paper flower to the page over the swirls.

14. Apply foam square to the back of flower cardstock stickers.

15. Adhere them to the pages. Adhere the umbrella stickers, title, and journaling spot directly to the page. Adhere the clouds with foam dots above the umbrellas.

Finish off the page by handwriting "bring" and small raindrops coming from the clouds. Add your journaling above the photo.