
As I stated before, I love using flowers in my layouts and have been excited with all the new ways of making paper flowers that are out there. For this layout, I made flowers using an accordian fold and now I'm addicted! It's so simple and fun, and you can make them to coordinate with whatever patterned paper you are using. Here are the instruction to make your own accordian fold flowers.

4. Next, apply adhesive to one end of the strip and then stick it to the other end, creating a cylinder.

6. Pushing in toward the center, hold the bloom so the center hold is as small as possible and add hot glue or quick dry glue to the center, sealing with a circle of paper.
1. Cut a strip of patterned paper to the desired size. A 1" cut results in about a 2" flower.

2. Score the paper and 1/4" intervals. I used the gutter on my paper trimmer and an embossing tip.
3. You will not have a strip with folds all down the length of it. Fold the strip like a fan from end to end.


5. Now, decide which side you want to be the back. This is the side that should be facing out. Push the paper down toward the center to create the bloom shape.


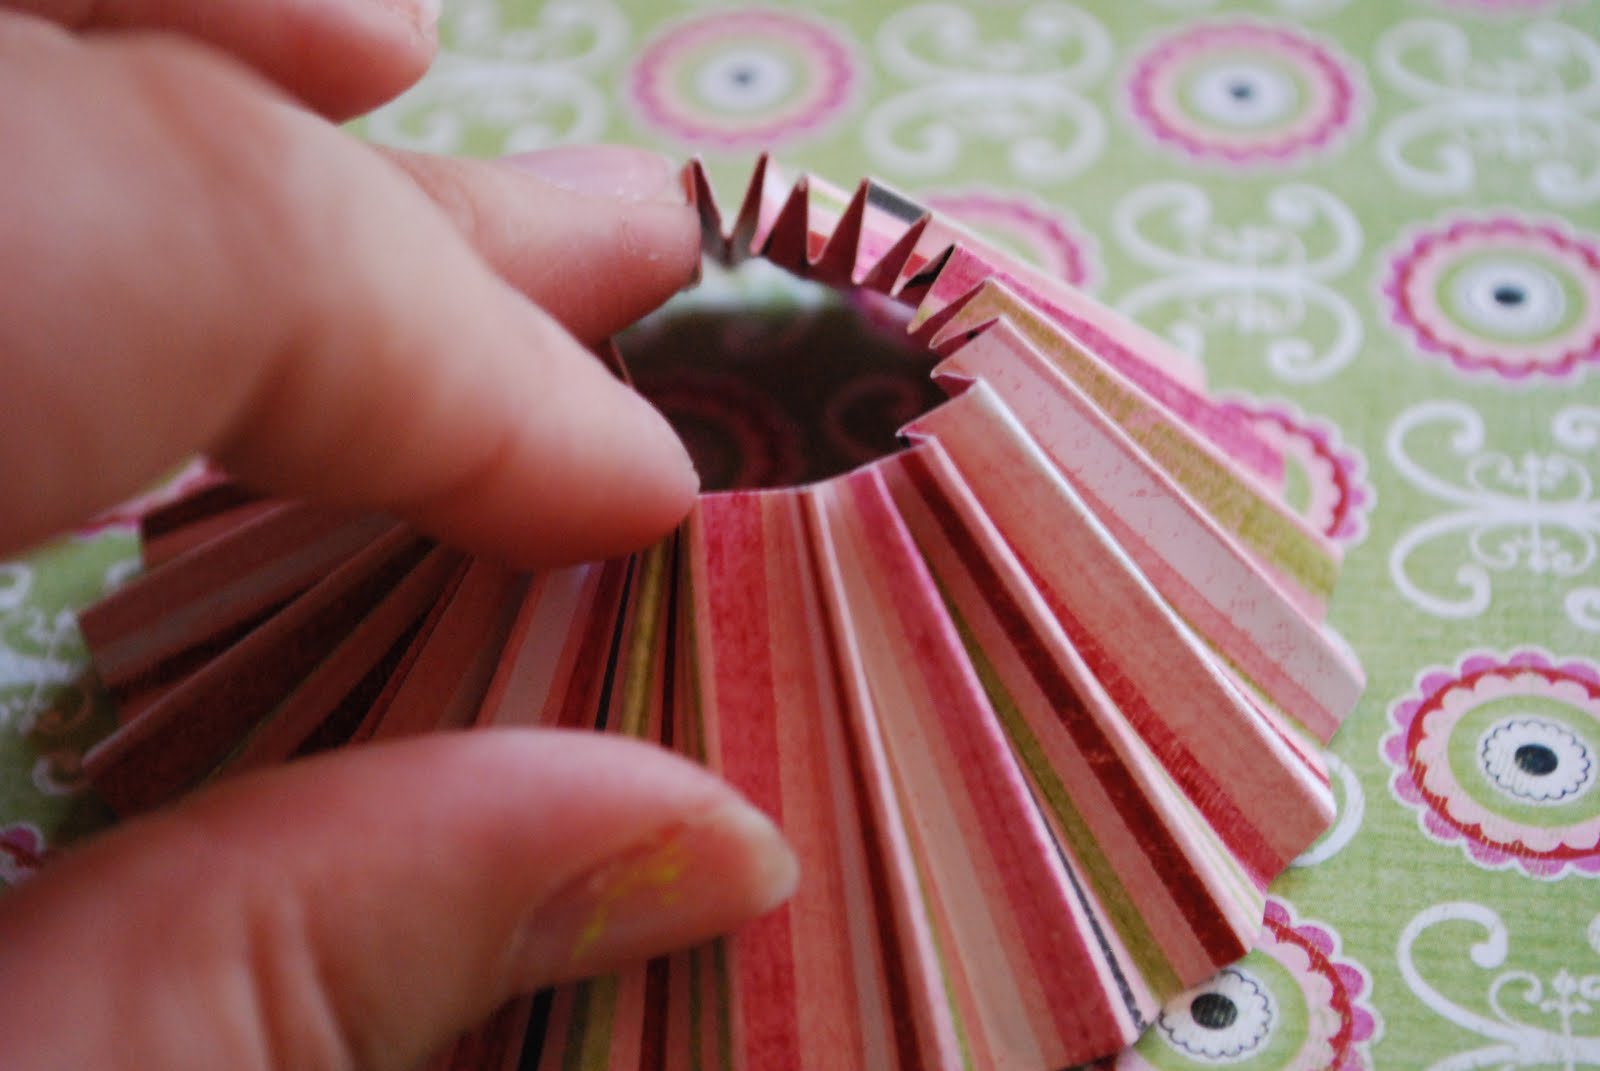

7. Let this set then turn over and embellish the center.

These flowers are so simple and can be used for a variety of projects from layouts to cards!


No comments:
Post a Comment